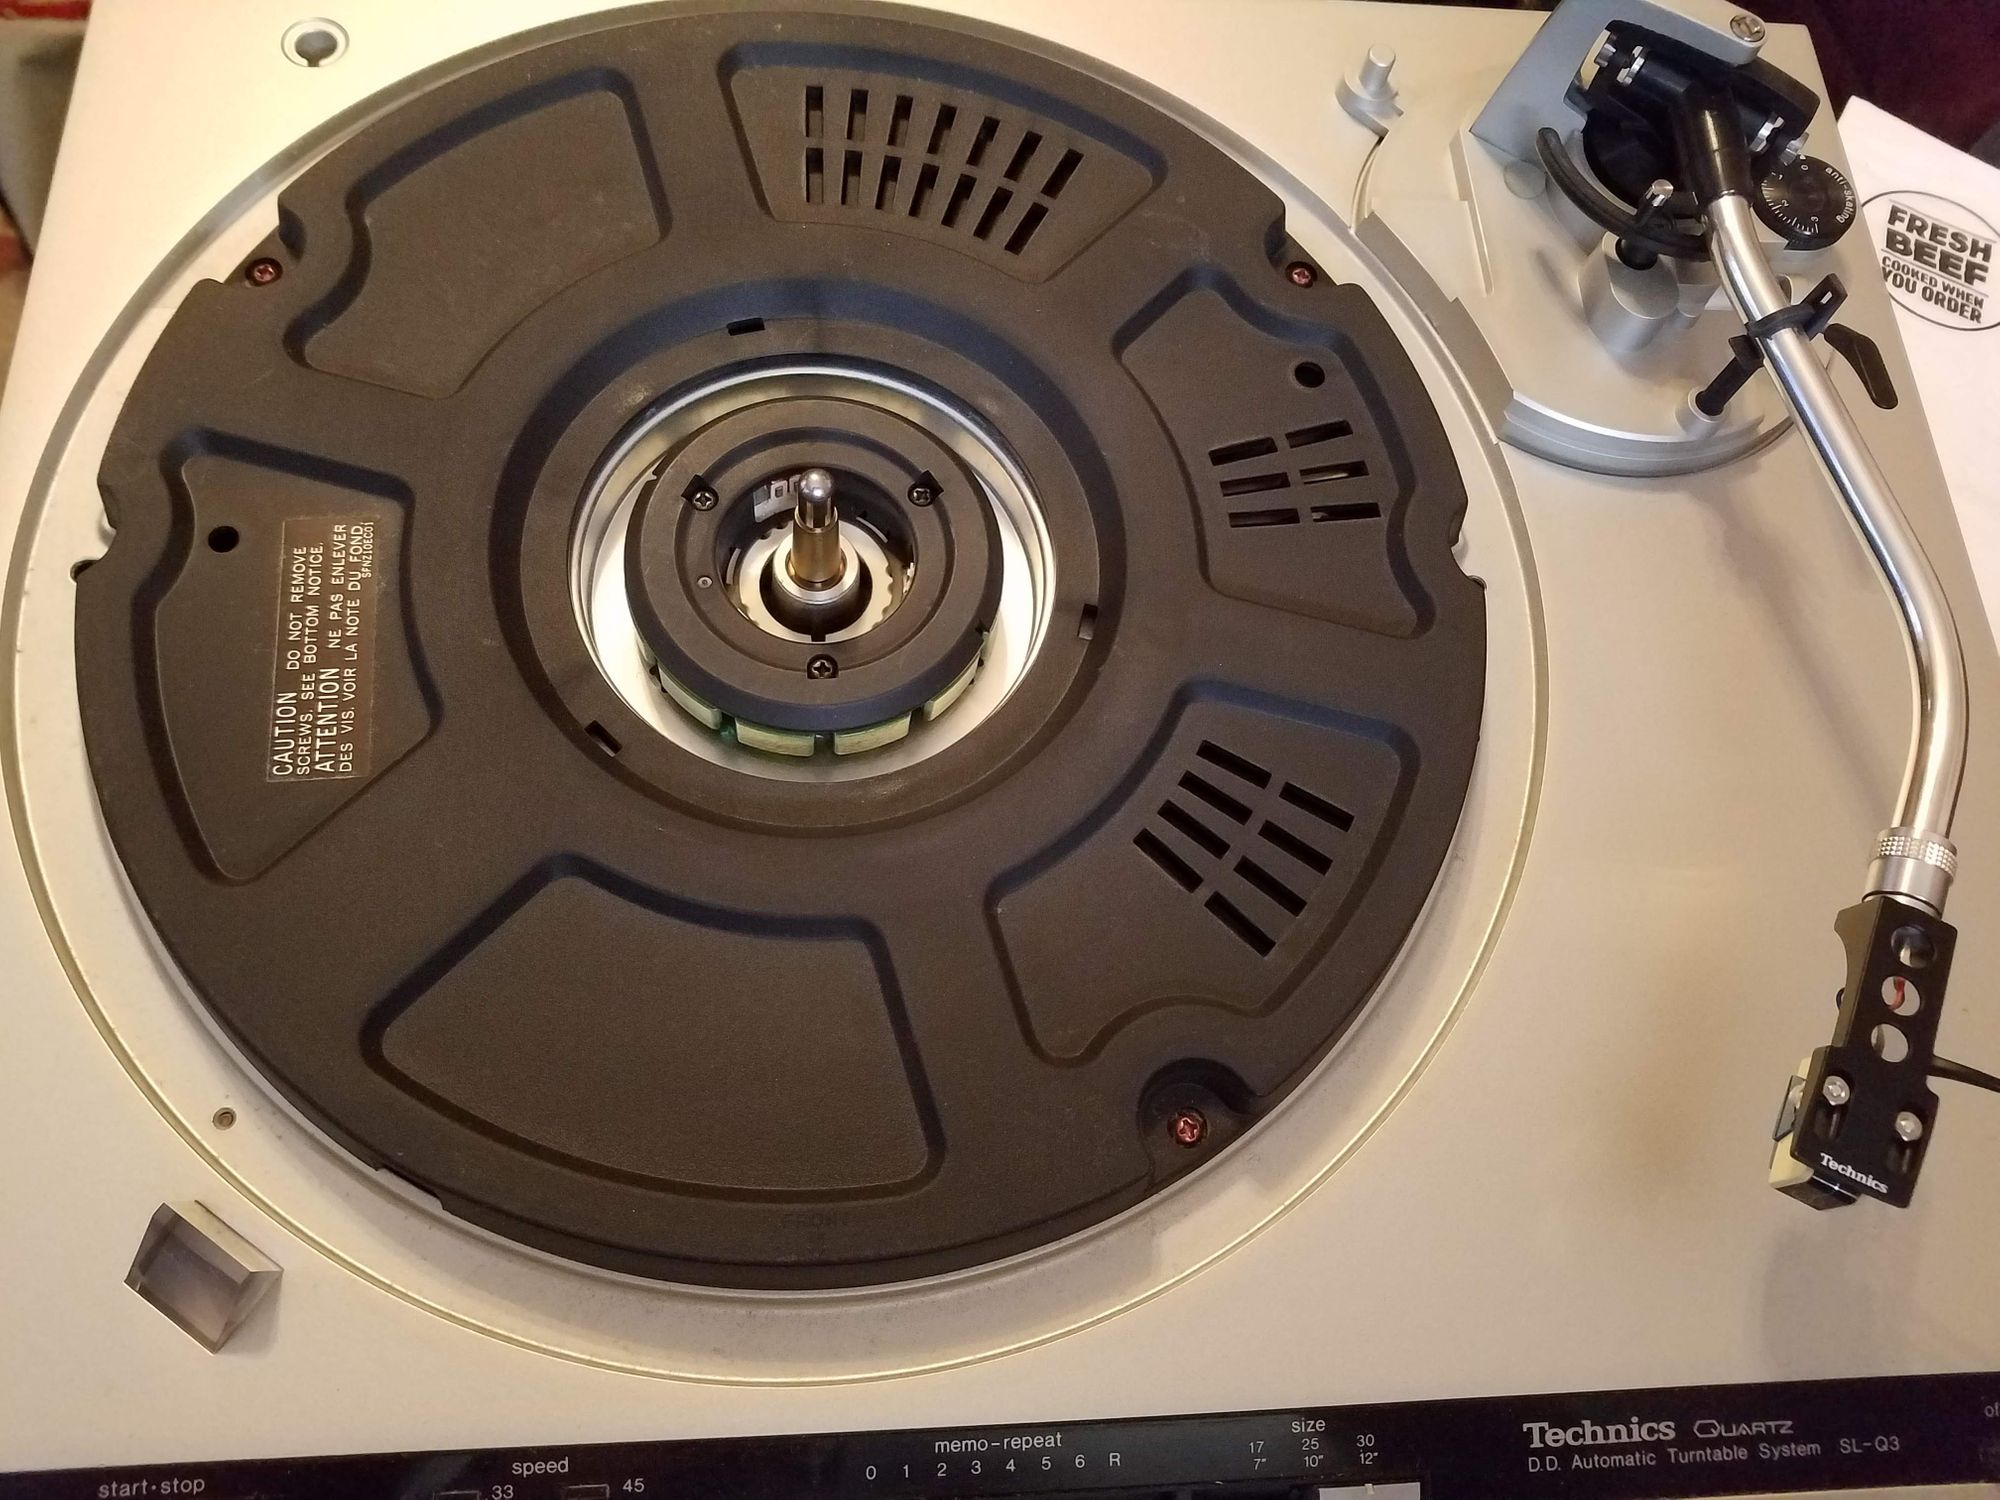
The Technics SL-Q3 is a fully automatic, quartz locked, direct drive turntable that was on the market between 1979-1980 (at least according to its listing on vinylengine.com). Its a pretty solid unit that incorporates the rather ubiquitous S shaped tone arm and quick change headshell found on many Technics models. One small feature I wish it had was the ability to raise and lower the arm from the main controls instead of only having the usual lifting lever, but it's a fairly minor want that is well offset, in my opinion, by the fact that it supports automatic play of all 3 standard record sizes (7in, 10in, and 12in). Many automatic turntables omit the 10in size as its the least common of the 3 main sizes and the reduction in complexity decreases the per unit cost. This is especially prevalent on automatic turntables that also incorporated automatic size selection which required special, and rather precise, cutouts in the platter and platter mat on top of the additional electrical circuitry.
This SL-Q3 was found at a flea market in fairly good condition with its original, albeit scuffed, dust cover. A quick once over didn't reveal any glaring issues and it appeared to be exactly what I was looking for in a used turntable so I quickly snatched it up. The cartridge it came with ended up being an Audio-Technica M12e which very much needed a new stylus. The previous one had been sitting on the cartridge so long that the plastic had become hard and brittle. I basically had to break the thing apart with pliers to get it off and slip a new stylus on. During the initial function test the table turned on and spun, the integrated strobe showed the 33 and 45 speeds were both reached and stable, but the start up seemed a bit sluggish and there was at least one obvious issue with old grease as the size selection slider was getting pulled towards 12in when in the 7 or 10in position semi-randomly. All in all it pretty much just needed some basic TLC to get it back into tip top shape.
The todo listed ended up including:
- lubricating the motor spindle
- replacing all the electrolytic capacitors on the its main board
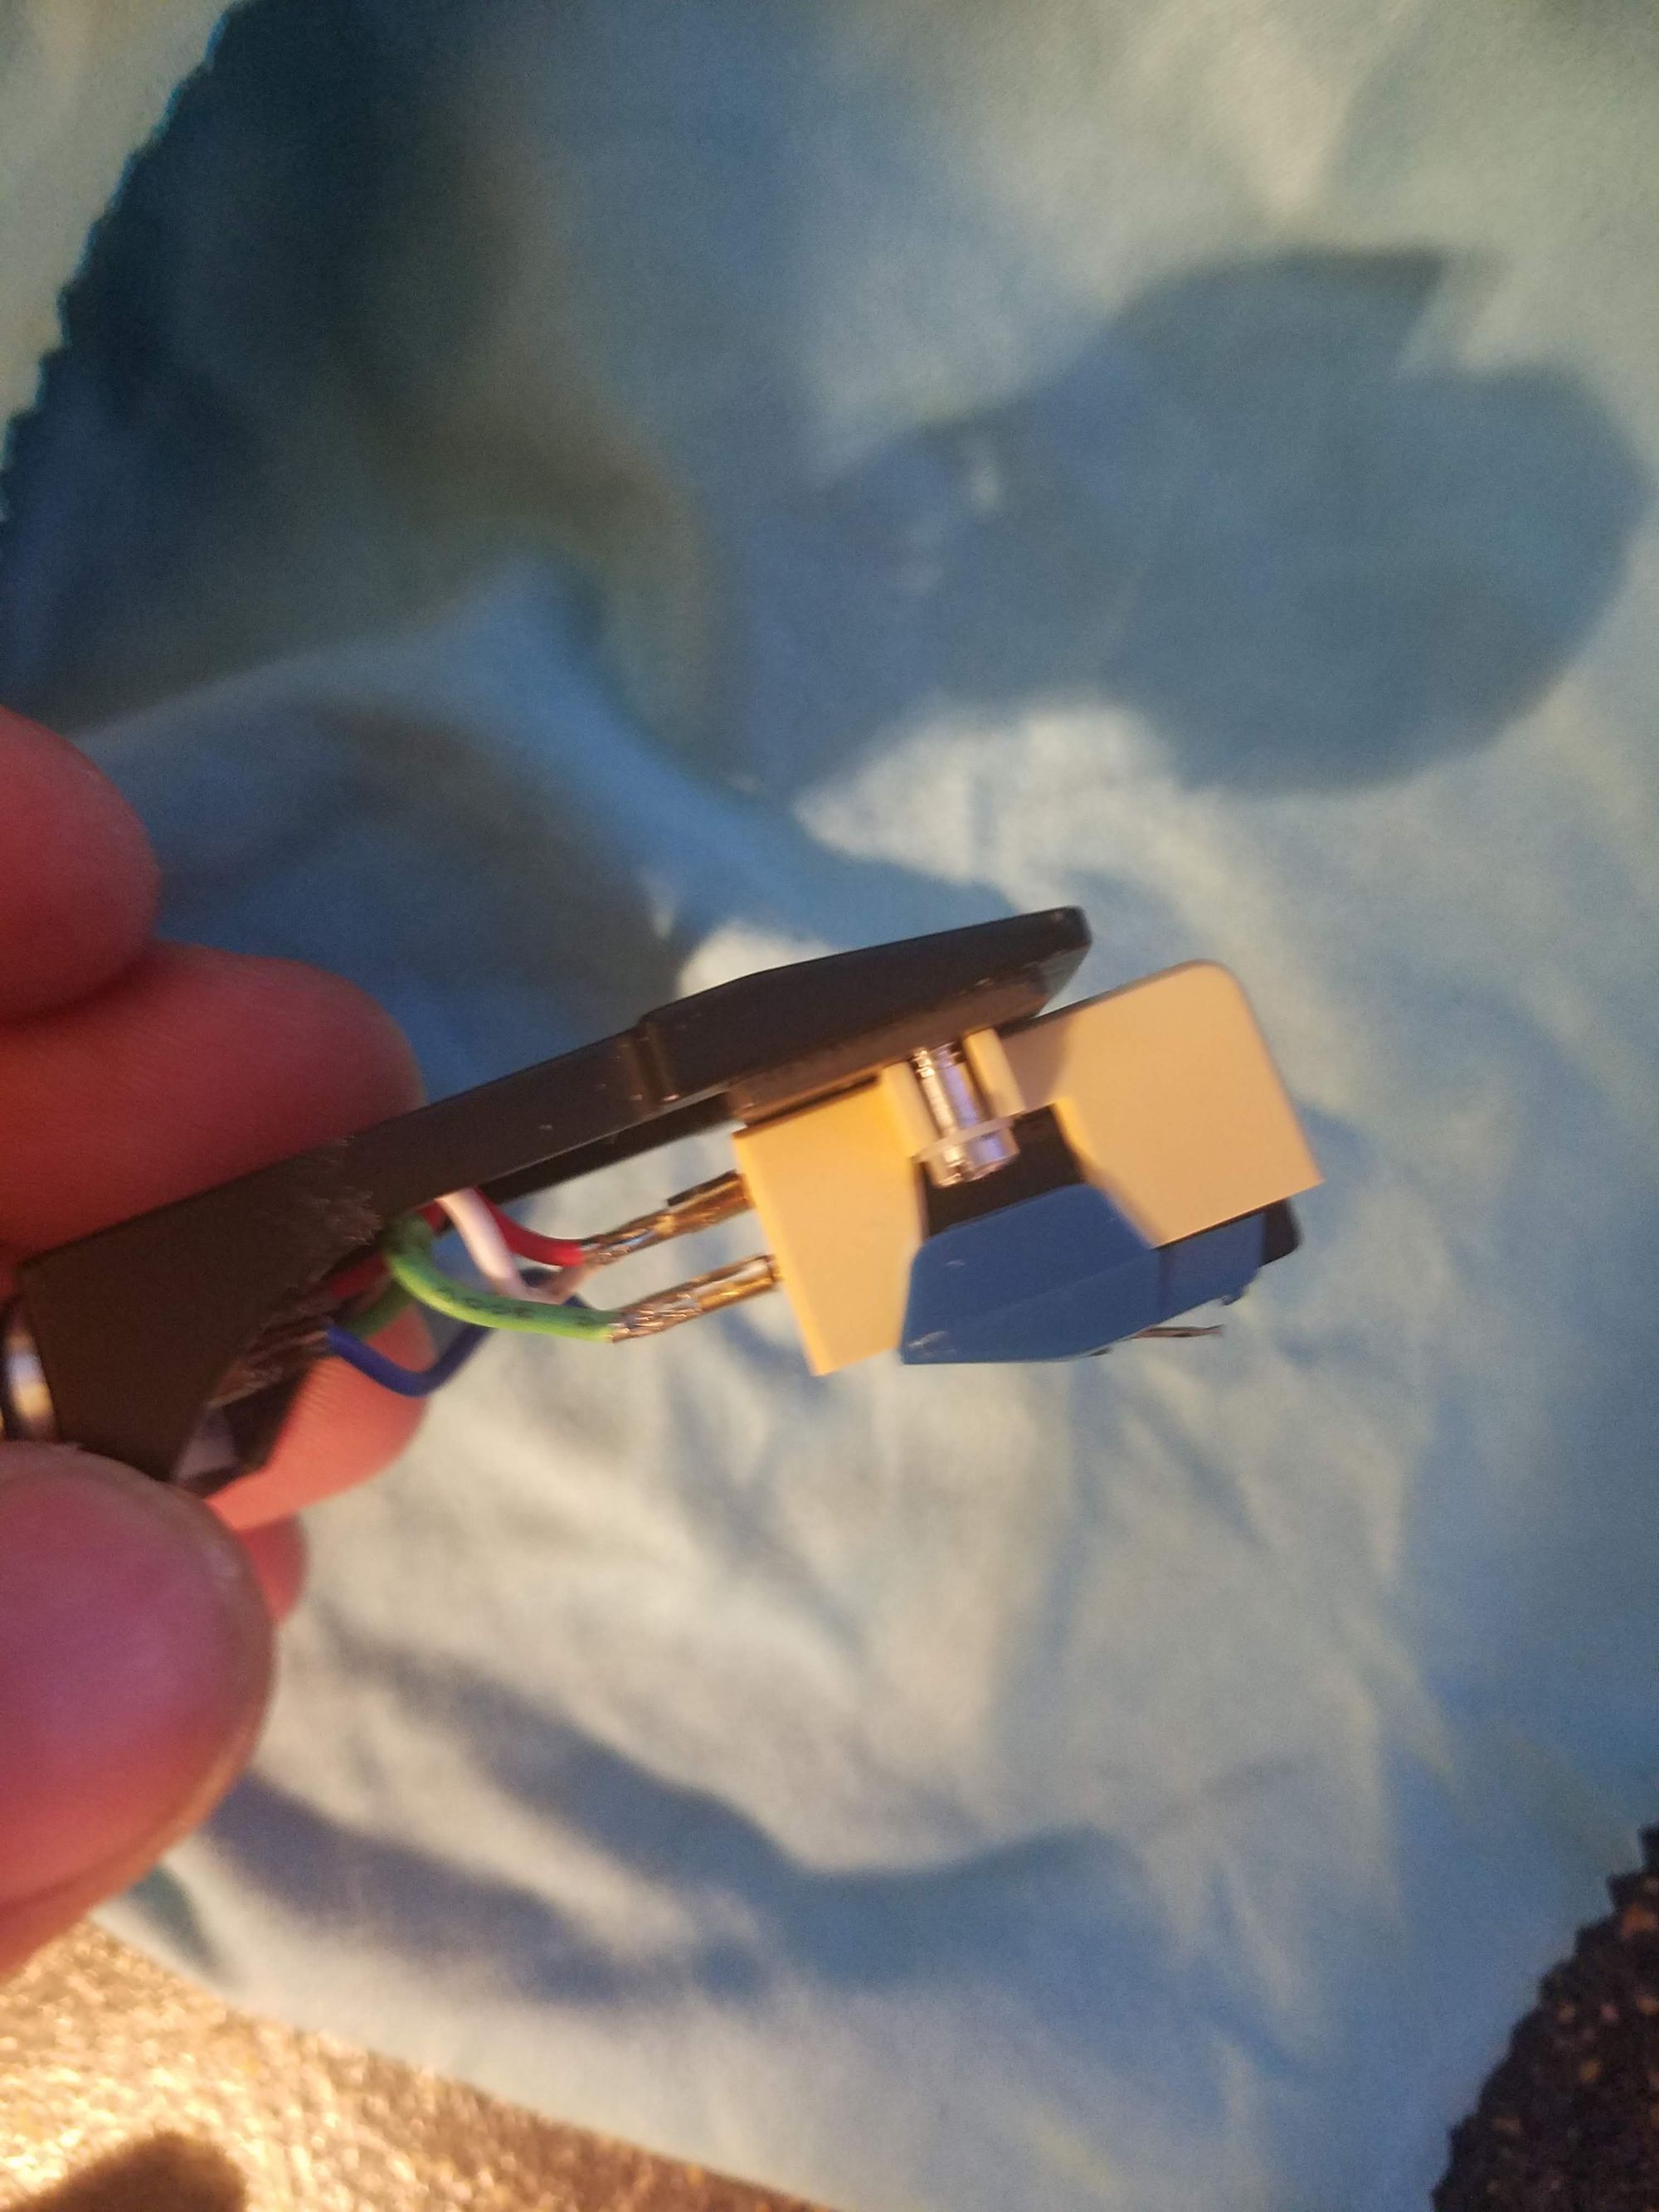
- replacing the stylus
- cartridge alignment
- re-balancing the tonearm
- cleaning up a few scuffs and marks.


Items that were needed to do the repair included
- Misc capacitors as needed
- Motor oil
- Some new grease
- A new stylus
- Desoldering Iron
- Stylus Protractor
- Stylus Weight Scale
- The Service Manual
- New 45RPM Adapter

Since it was so old and brittle, the old stylus had to be carefully pried off with a pair of needle nose pliers and you can clearly see how old it was based on the color difference between the top and bottom of the stylus housing. The new stylus snapped right on and the cartridge itself proved to still have plenty of life left in it.


I managed to replace all the capacitors without fully removing the main PCB from the turntable since I wanted to avoid having to fully gut the entire table just to take the board out. With the top and bottom removed it was easy enough to use a desoldering iron to remove all the old capacitors and replace them with new ones.

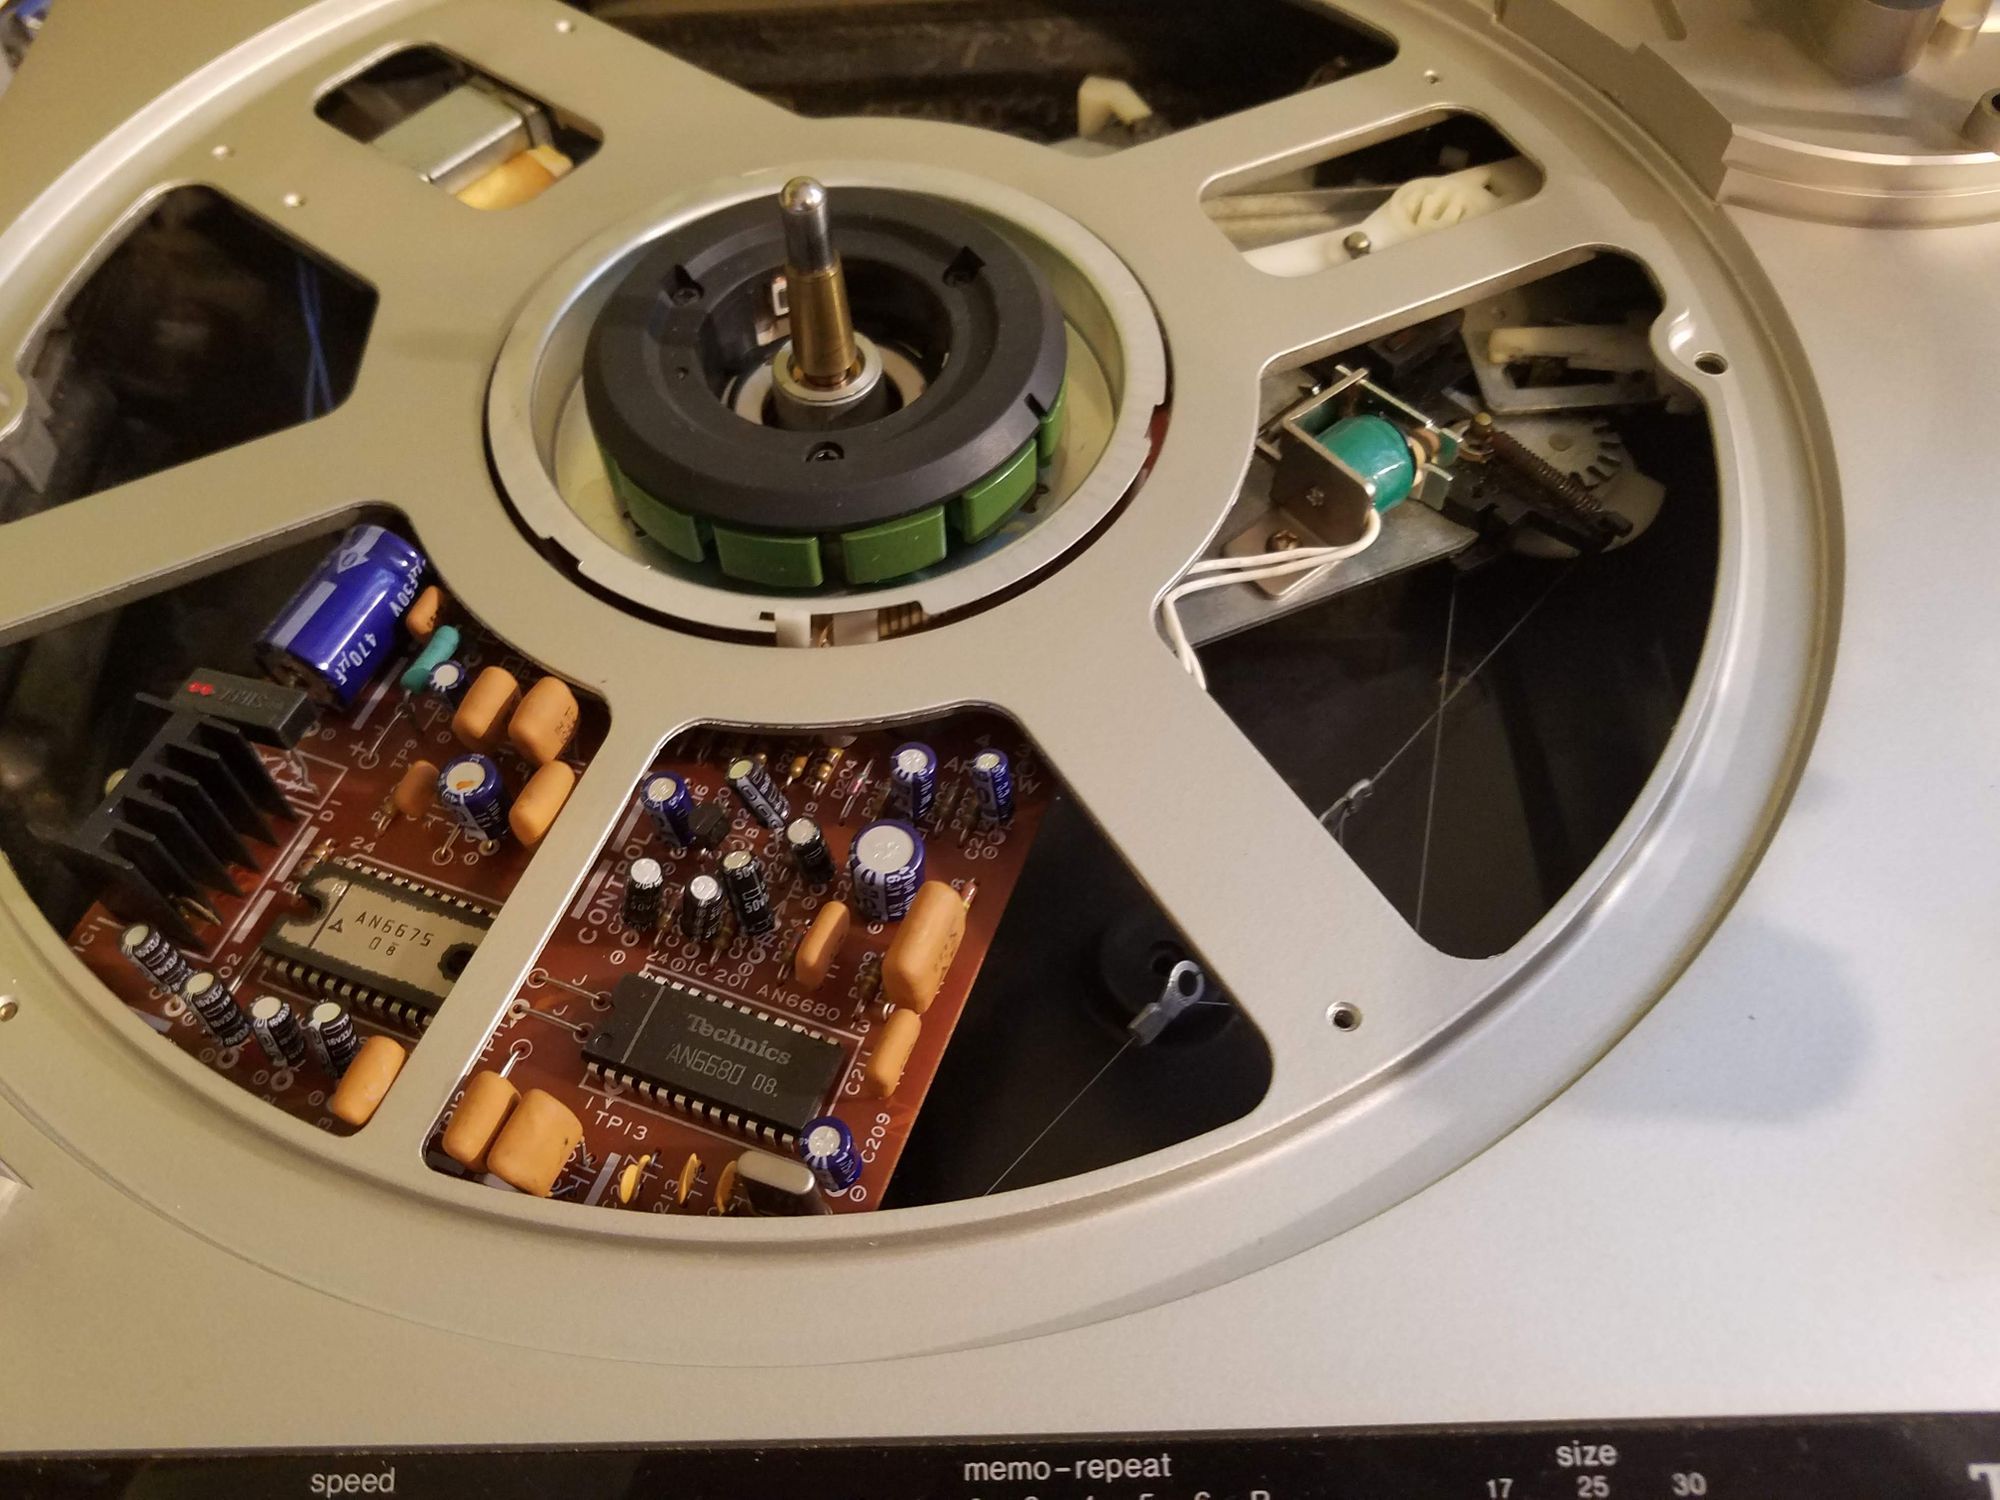
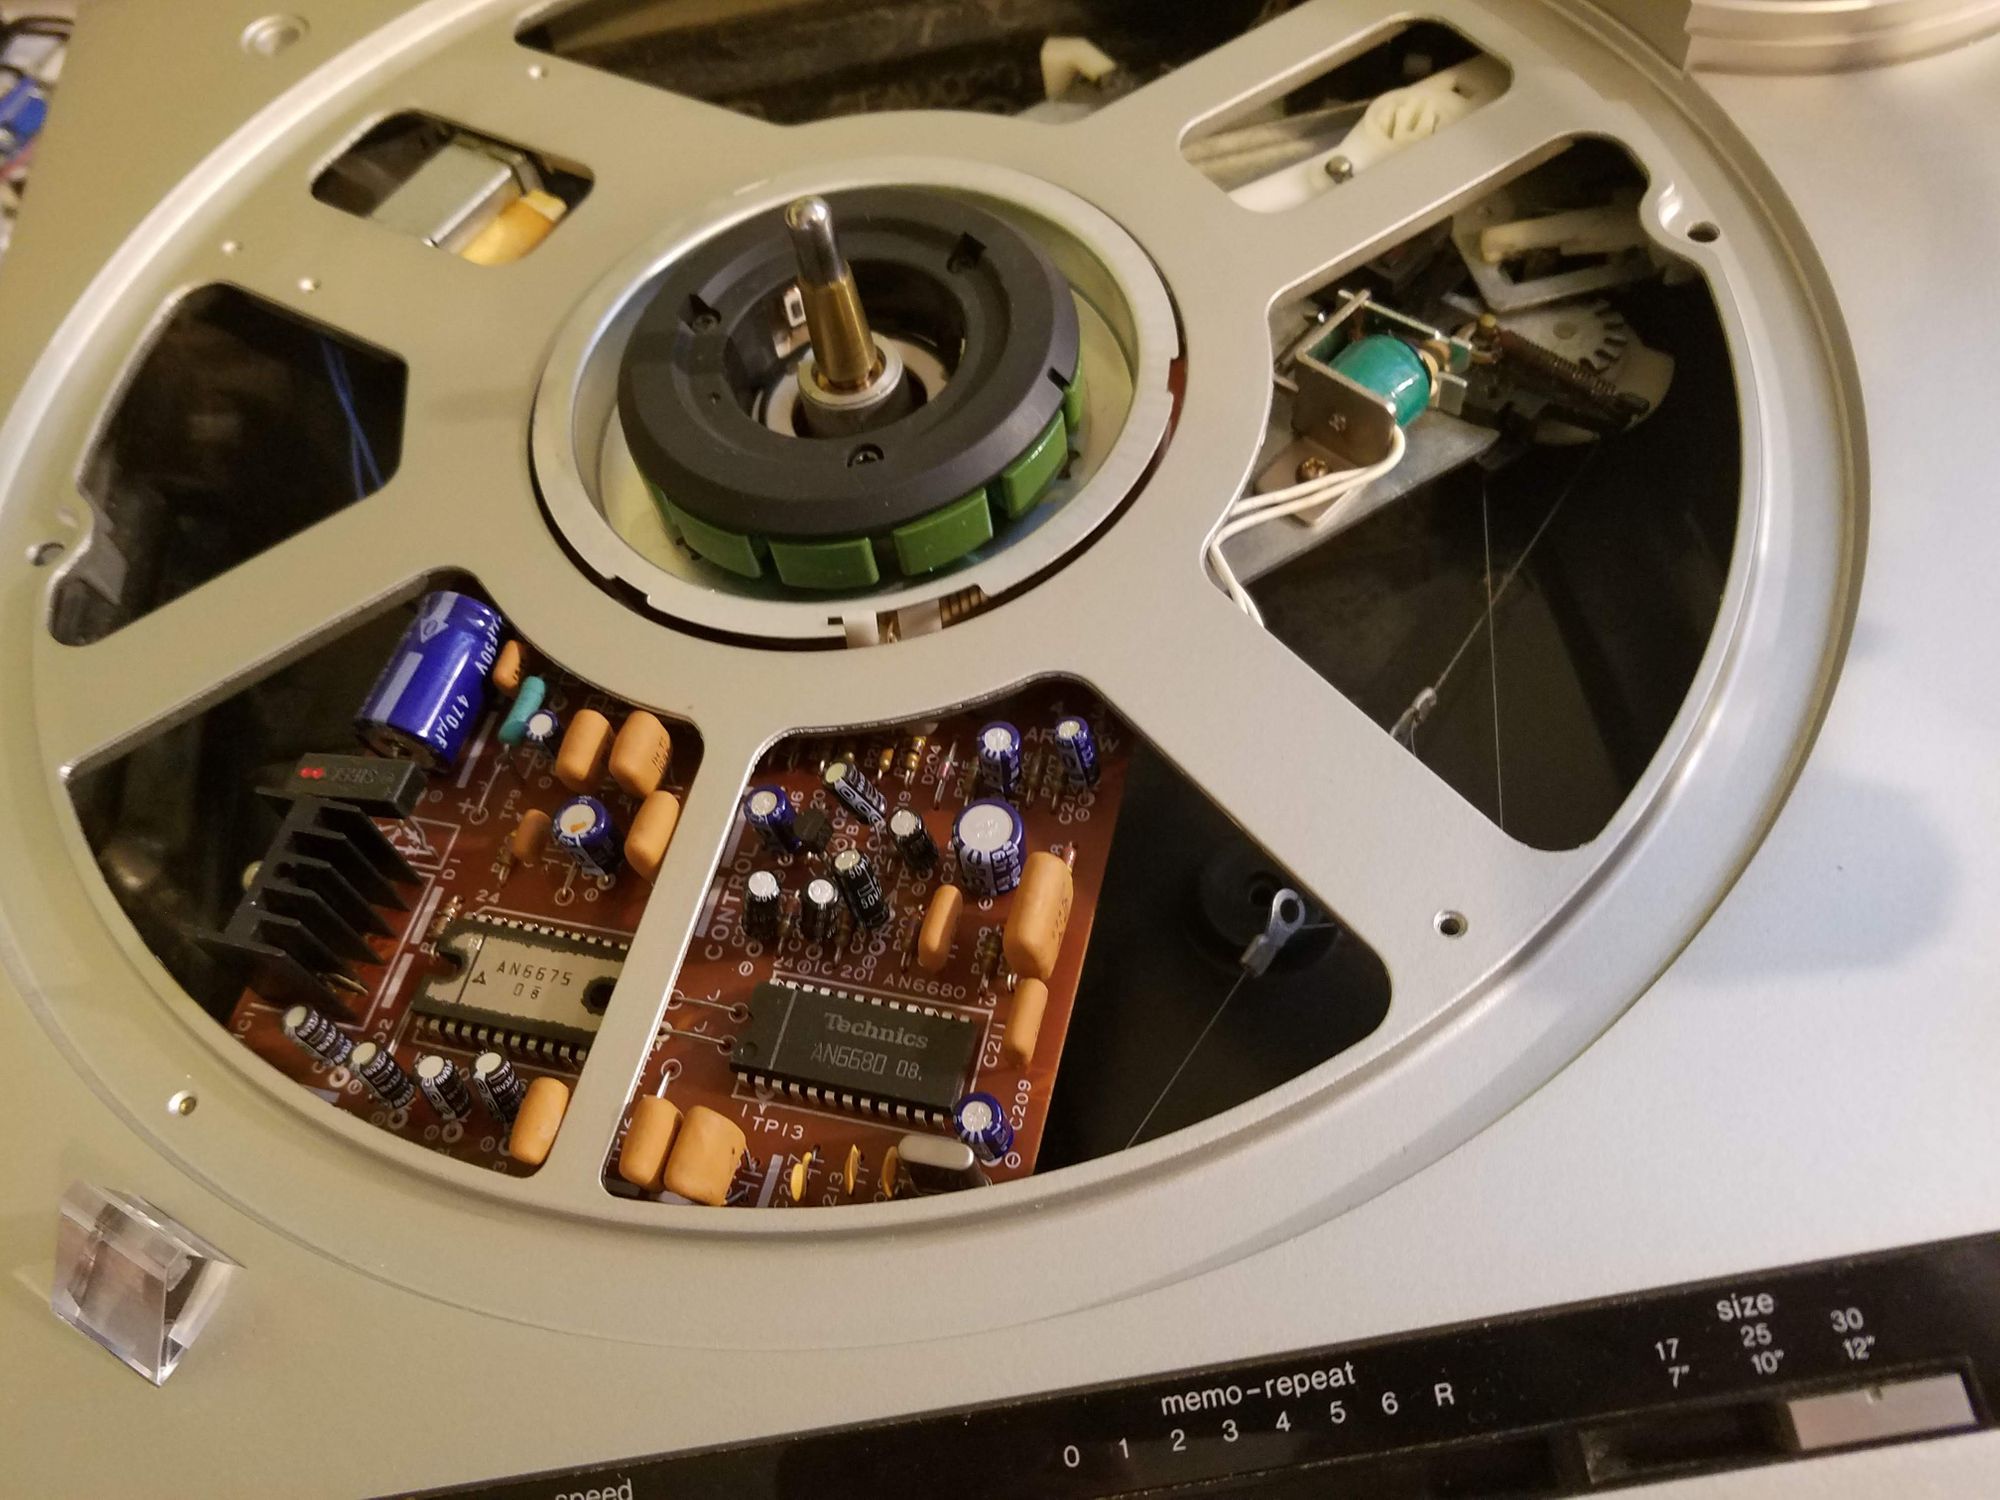


With the bottom removed I cleaned up the old hardened grease and lubricated the surfaces with the white lithium grease. I made sure to get a good amount of new grease on the wires and pulleys that connect the size selector to the main mechanism since the old grease caused a clear issue with its function.


With the capacitors and grease changed out the only thing left to do was put it back together, do a basic cleaning of the outside, and place the new 45 adapter in its new home. I did attempt to buff out some scratches to the top cover, but the results weren't as drastic as I hoped so I didn't bother to cover it here.


